This post is a remainder to my future self on how to reinstall Ubuntu and CUDA in my quite old notebook. The reason behind that is that my programming environment always gets broken because of Ubuntu’s automatic updates (which I’m trying to turn off now).
First step: Get 2 Usb drives, one with Ubuntu, and one with CUDA
As you read it, is super important to download those things before the installation itself. My computer, an old Lenovo-Z40 with an Nvidia Geforce 820M GPU, supports up to CUDA 6.5, and up to Nvidia driver 340. I’ve installed Nvidia driver 430, but it crashes, so it’s better to stick with 340, which is also recommended for legacy devices (I think I read that somewhere).
I’ve tried Ubuntu 16.04 and 14.04, and both work fine, but we will use 16.04 because is a newer release. Likewise, I tried Ubuntu 18, but it didn’t work. You can download Ubuntu 16.04 from the Ubuntu site:
https://releases.ubuntu.com/16.04/
To make a bootable USB, you can use rufus if you have windows installed. It works like a charm! I still can’t recommend a tool because I haven’t the need to make a bootable USB drive in Linux yet.
The way that has worked best for me to install CUDA has been the run installation. The one that works in this computer and Ubuntu version is the Ubuntu 14.04 x86 64-bit one, so make sure to download that version (even if we are booting the Ubuntu 16.04 version). It can be downloaded from the official Nvidia webpage:
https://developer.nvidia.com/cuda-toolkit-65
Second step: Install Ubuntu in a dual boot
I play video games a lot, and that’s the reason why I like to keep a Windows OS partition in my computer. I won’t go in details about how to make a dual boot in a computer, because there are tons of tutorials on how to make that on the internet, but I would definitely recommend keeping one working Windows partition if you have only one Laptop or PC.
Something that had saved me a lot of headaches and time is that if you already have an Ubuntu partition that you want to override with a new one, the installation wizard will give you the option to rewrite the old one. Surprisingly enough, It works without breaking anything else.
Third step: Update Linux headers and Ubuntu packages
This step is super important! You have to update Linux headers and Ubuntu packages in order to be able to install the libraries recommended for CUDA development (mainly for graphics programming, which I do).
To update packages, you only have to boot Ubuntu and wait a pop-up to appear, which says that there are some updates pending, and gives you the option to update them.
Fourth step: Install Nvidia driver
To install the Nvidia driver, you can use the graphical method. Just look for the “Additional Drivers” application in the menu, and then install the Nvidia 340 driver. After it gets installed, a restart button will appear -then you have to restart your computer-.
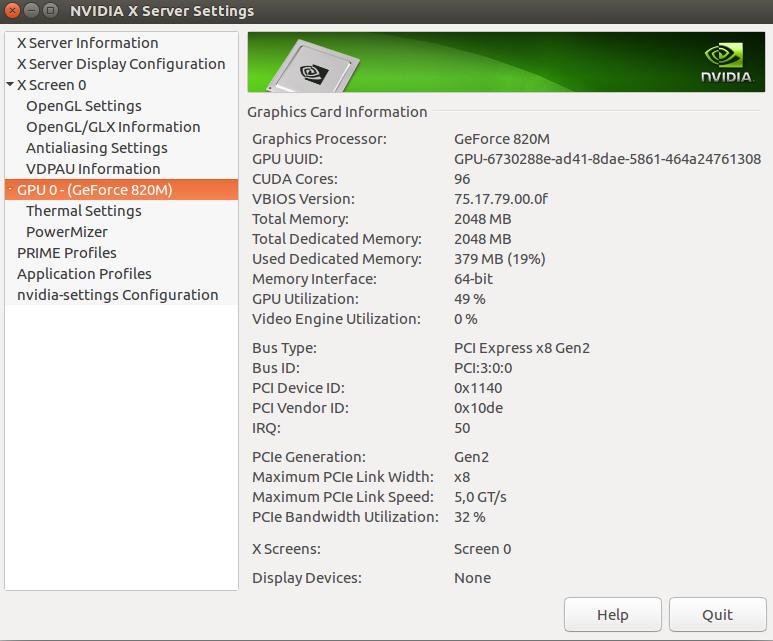
To make sure the driver installation was successful, you can boot again Ubuntu and look for the “NVIDIA X Server Settings” application. Open it, and if it shows some information about your GPU, the installation was a success! It should look like this:
Fifth step: Install Cuda
Run the following command in the shell:
$ sudo sh cuda_6.5.14_linux_64.run --override
Then the installation wizard will appear. You have to make sure to DON’T INSTALL DRIVERS AGAIN, that’s very important. Also, is super useful to get installed the CUDA samples too, so make sure you install those.
Then, to check that the installation went fine, open a terminal in the “whatever_folder/NVIDIA_CUDA-6.5_Samples” folder. Then build the “1_Utilities/deviceQuery” example. It checks that CUDA is able to recognize the GPU. If it runs successfully, it will output something like the following:
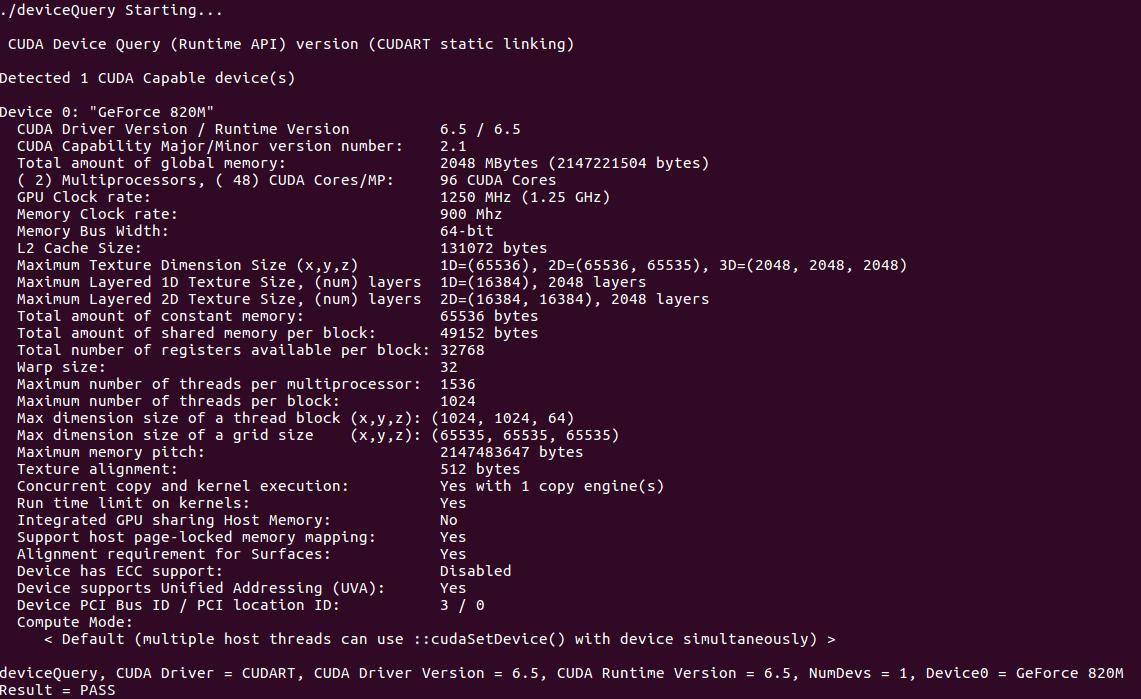
If you have issues building deviceQuery, it might be the g++ version. CUDA-6.5 Only works with gcc-4.8 and older versions. I usually have installed a lot of g++ versions, and override /usr/bin/g++ to whatever version I need in that specific moment. I think (and hope) that there are better ways to manage g++ versions, but this has worked fine for me. Update on this: If you are using CMake in order to generate Make files to build a Cuda/C++ application, you can set the CXX environment variable to gcc-4.8 before using cmake. This will tell CMake to generate the Make file with the correct C++ version.
If you want, you also can install CUDA recommended dependencies for graphics programming:
$ sudo apt-get install g++ freeglut3-dev build-essential libx11-dev libxmu-dev libxi-dev libglu1-mesa libglu1-mesa-dev
You can check if it worked running one of the examples in the “NVIDIA_CUDA-6.5_Samples/5_Simulations/” folder. I really like the particles one :0
Optional step: Freeze your Ubuntu updates
Ubuntu, at every single update, breaks all the graphics drivers in this particular pc. This is due the fact that is a rather old one. To make sure your setup will keep working forever, you can freeze Ubuntu updates unchecking all checkboxes in the “Updates” tab, in the “Software&Updates” application.